Shooting documentary interviews: light, sound and the chair
Most of the interviews I regret were lost before anyone said a word. The room hummed, the chair swivelled, and the window behind the subject went from grey to blazing in twenty minutes, so I spent the afternoon fixing problems instead of listening. A sit-down interview looks like the simplest scene in documentary. It is also the one you will cut back to more than any other, which means every flaw gets repeated across the whole film.
What follows is the setup I now use on small shoots, usually with a crew of two or three. None of it needs expensive gear. It needs an early arrival, some fussiness, and the discipline to let go of the technical side once the conversation starts.
Choose the room with your ears
Scouting a room for an interview is mostly listening. Stand in it with your eyes closed for a full minute and count what you hear: fridge, furnace, a ticking clock, traffic, office ventilation that nobody can switch off. Then ask whether each sound can be stopped. If the fridge gets unplugged, put your car keys inside it, because you will not leave without them.
Next, look for depth. A room that lets you place the subject two or three metres in front of the background gives you separation, softer focus behind them and space for a back light. Bare rooms ring. Books, curtains and rugs soak up echo, which is why a cluttered study usually beats the tidy kitchen people always offer first.
Think hard about what the background reveals. A home tells the audience who someone is, which is good when it is chosen and less good when it shows more than they meant to share. That matters most when the subject has reasons to stay hard to find, a point the essay on Shelley Saywell and filming women who flee violence makes with real care. Check windows for street signs and house numbers, check walls for family photos, and check what the lens sees through every doorway.
The chair matters more than the camera
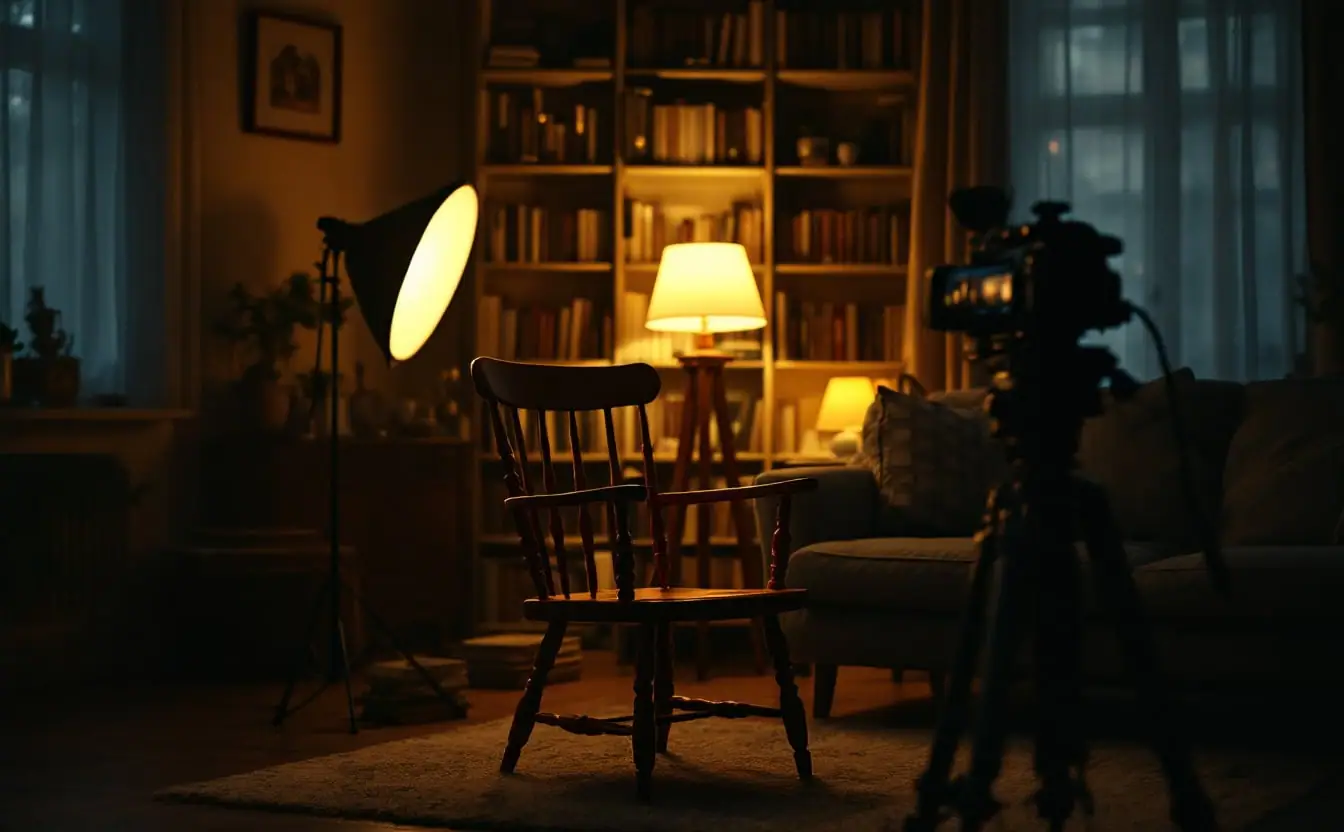
No swivel chairs. No rocking chairs, no office chairs on castors, nothing with a spring that squeaks. Nervous people move, and a seat that lets them turn a few degrees with every answer will wreck your framing and your continuity. A plain wooden chair or a firm armchair is ideal; I keep a sturdy folding one in the car for houses that have nothing suitable.
Set the chair and sit in it while someone else checks the frame. People lean back once they relax, so make sure the head still sits where you want it when they do. Then tape the floor at the front legs, so the chair returns to the same spot after every break.
Eyeline: on-axis or off-axis
The biggest stylistic decision in an interview is where the subject's eyes go. Off-axis is the familiar documentary look: the interviewer sits beside the lens, the subject looks just past the camera, and the audience watches a conversation from a little way off. It is forgiving. It lets people talk to a real face instead of a piece of glass.
On-axis means the subject looks straight down the lens, and so straight at the viewer. Errol Morris made this approach famous with the Interrotron, a rig built on teleprompter glass that puts his face over the lens, so his subjects look into the camera while talking to him. A beam-splitter teleprompter and a small monitor fed by a second camera aimed at the interviewer will do the same job. The effect is intimate, sometimes confrontational. It also asks more of the subject, and some people stiffen when they realize they are talking to a reflection.
If you go off-axis, keep the interviewer's head close to the lens, at the subject's eye level, on the side where the frame has more open space. Drift further away and the audience gets a profile. Profiles feel like surveillance. Whatever you choose, choose early and stay consistent, at least within each person.
Light: key, fill, back and the lamp in the corner
The classic setup still works. A key light, large and soft, goes on the side of the face away from the camera, roughly 30 to 45 degrees off the line of the nose. A softbox, a bounce off a white board or a light pushed through a diffusion frame will all give that wrap. Lighting the far side of the face gives it shape; lighting the near side flattens people into passport photos.
Fill is often unnecessary, since in many rooms the walls already bounce enough. What most interviews need is the opposite: a black flag or a sheet of duvetyne on the shadow side, known as negative fill, absorbs the stray bounce and gives the face back its contour. It is the cheapest piece of lighting kit you will ever own and the one that does the most work.
A back light, small and high behind the subject, separates hair and shoulders from the background. Keep it subtle, or the subject starts to look like a shampoo advertisement. Then find the practicals, the lamps that appear in the shot, swap in warmer bulbs and dim them to a small glow. They tell the audience the interview happened in a real place, which it did.
Windows and daylight drift
A window is a gorgeous key light for about twenty minutes. Then a cloud moves, the sun swings round the building, and your exposure and colour temperature wander from answer to answer. Try cutting minute ten against minute fifty and the drift jumps out.
Either commit to daylight and shoot fast, or take control: diffuse the window, keep it out of frame, and let your own light carry the face. Set white balance manually and leave it alone. On a long day, check the frame every half hour and fix any shift between questions.
Sound: two microphones and a minute of nothing
Picture problems can sometimes be graded away. Sound problems mostly cannot. Record a lavalier and a boom on separate channels: the lav gives a steady level, the boom, overhead and just out of frame, a more natural tone. When the lav rubs on a sweater halfway through the best answer of the day, the boom saves you.
Hide the lav with care. Tape the cable so it does not rustle, keep the capsule away from necklaces and buttons, and ask before you reach anywhere near someone's clothing. Better still, hand them the mic and show them where it goes. Then wear headphones for the entire interview. Not most of it.
Before anyone moves at the end, record room tone: 30 to 60 seconds of the room with everyone in place and silent, every light and fan still running. The editor uses it to fill gaps and smooth cuts. Announce it, ask for stillness, and hold the full minute even though it feels endless. It always does.
Listening, and the uses of silence
All of this gear exists so that you can forget it. Once the camera rolls, your job is to listen, and good interviewers listen with their whole body. Nod rather than murmur, because every small "mm-hmm" lands on top of an answer you may want to use. Keep questions short and open.
Prepare your questions carefully, then be ready to abandon the list. Good research is what lets you follow a tangent with confidence, and the craft guide on background research for documentary is a sound place to begin. Ask people to fold the question into their answer, too, so the clip stands on its own.
Silence is the most useful technique I know. When someone finishes an answer, wait. Count to five in your head while keeping your face open and interested. People fill silence, and what they offer in the seconds after the polished answer is often the thing the film needs.
Two cameras, and B-roll on the same day
A second camera solves the cutting problem. Put the main camera on a medium shot and the second on a tighter lens from a slightly different angle, both on the same side of the eyeline. Now the editor can shorten an answer without a jump cut or a cutaway of fidgeting hands. Match frame rates and white balance, jam timecode or clap a slate on every card, and tell the second operator exactly what size to hold.
Plan B-roll for the interview day as well. On a small shoot in the Fraser Valley, I had one afternoon with a farmer who was never going to sit for a second session. The interview ran two hours. The hour after it, walking the barn and the fields with him as the light dropped, gave me most of the film's cutaways, because he was warmed up and everything he had mentioned was right there.
Paperwork is part of the setup
Get releases signed before the camera rolls, not after. A good release names the project, explains in plain language how the footage may be used, and says what happens if the person later has doubts. Broadcasters, distributors and insurers will want to see them, so use your broadcaster's or lawyer's template. Private property needs a location release, and minors need a parent or guardian to sign too.
Consent is also a conversation, and it is never only a signature. Explain what the film is, who will see it and where. For anyone at risk, talk through blurring, voice alteration, shooting in silhouette and keeping identifying places out of frame, and agree on those choices before you shoot. Once a face has aired, it cannot be taken back.
A setup checklist
Print this and run through it before every interview. It takes ten minutes and saves days:
- Room scouted by ear: fridge, furnace, clocks and fans found and switched off, keys in the fridge
- Background with depth, and no addresses, signs or photos the subject has not agreed to show
- Solid chair with no swivel, rock or castors, and its position taped on the floor
- Eyeline chosen: on-axis rig tested, or the interviewer's head right beside the lens
- Large soft key on the far side of the face, negative fill on the shadow side
- Small back light and one or two dimmed practicals in frame
- Window diffused or out of shot, white balance set manually
- Lav and boom recording on separate channels, headphones on
- Second camera on a tighter lens, same side of the eyeline, synced by timecode or slate
- Releases for the subject, the location and a guardian for any minor
- Room tone recorded before anyone stands up
- A short B-roll list for the rest of the day
When the list is done, put it away. Sit across from the person, look at them rather than at the monitor, and ask your first question as though none of the equipment existed. Everything you set up in that room travels with the footage into the cutting room, where finding the story in the edit starts with what happened in that chair.